
With the electronics picked out, the next big step was figuring out how everything would actually fit together on the desk. The simulator has a lot going on: switches, buttons, displays, bar graphs, a joystick, a keypad, speakers, and status lights. I needed a layout that grouped things logically and still looked like something out of a 1960s spacecraft.
I started the old-fashioned way, with pencil and paper. I sketched each panel on its own sheet and laid them on a table so I could move them around and see how they worked together. This made it easy to group related controls (boosters, fuel, pyrotechnics, electrical) and to think through how the kids would move from panel to panel as the mission progresses.
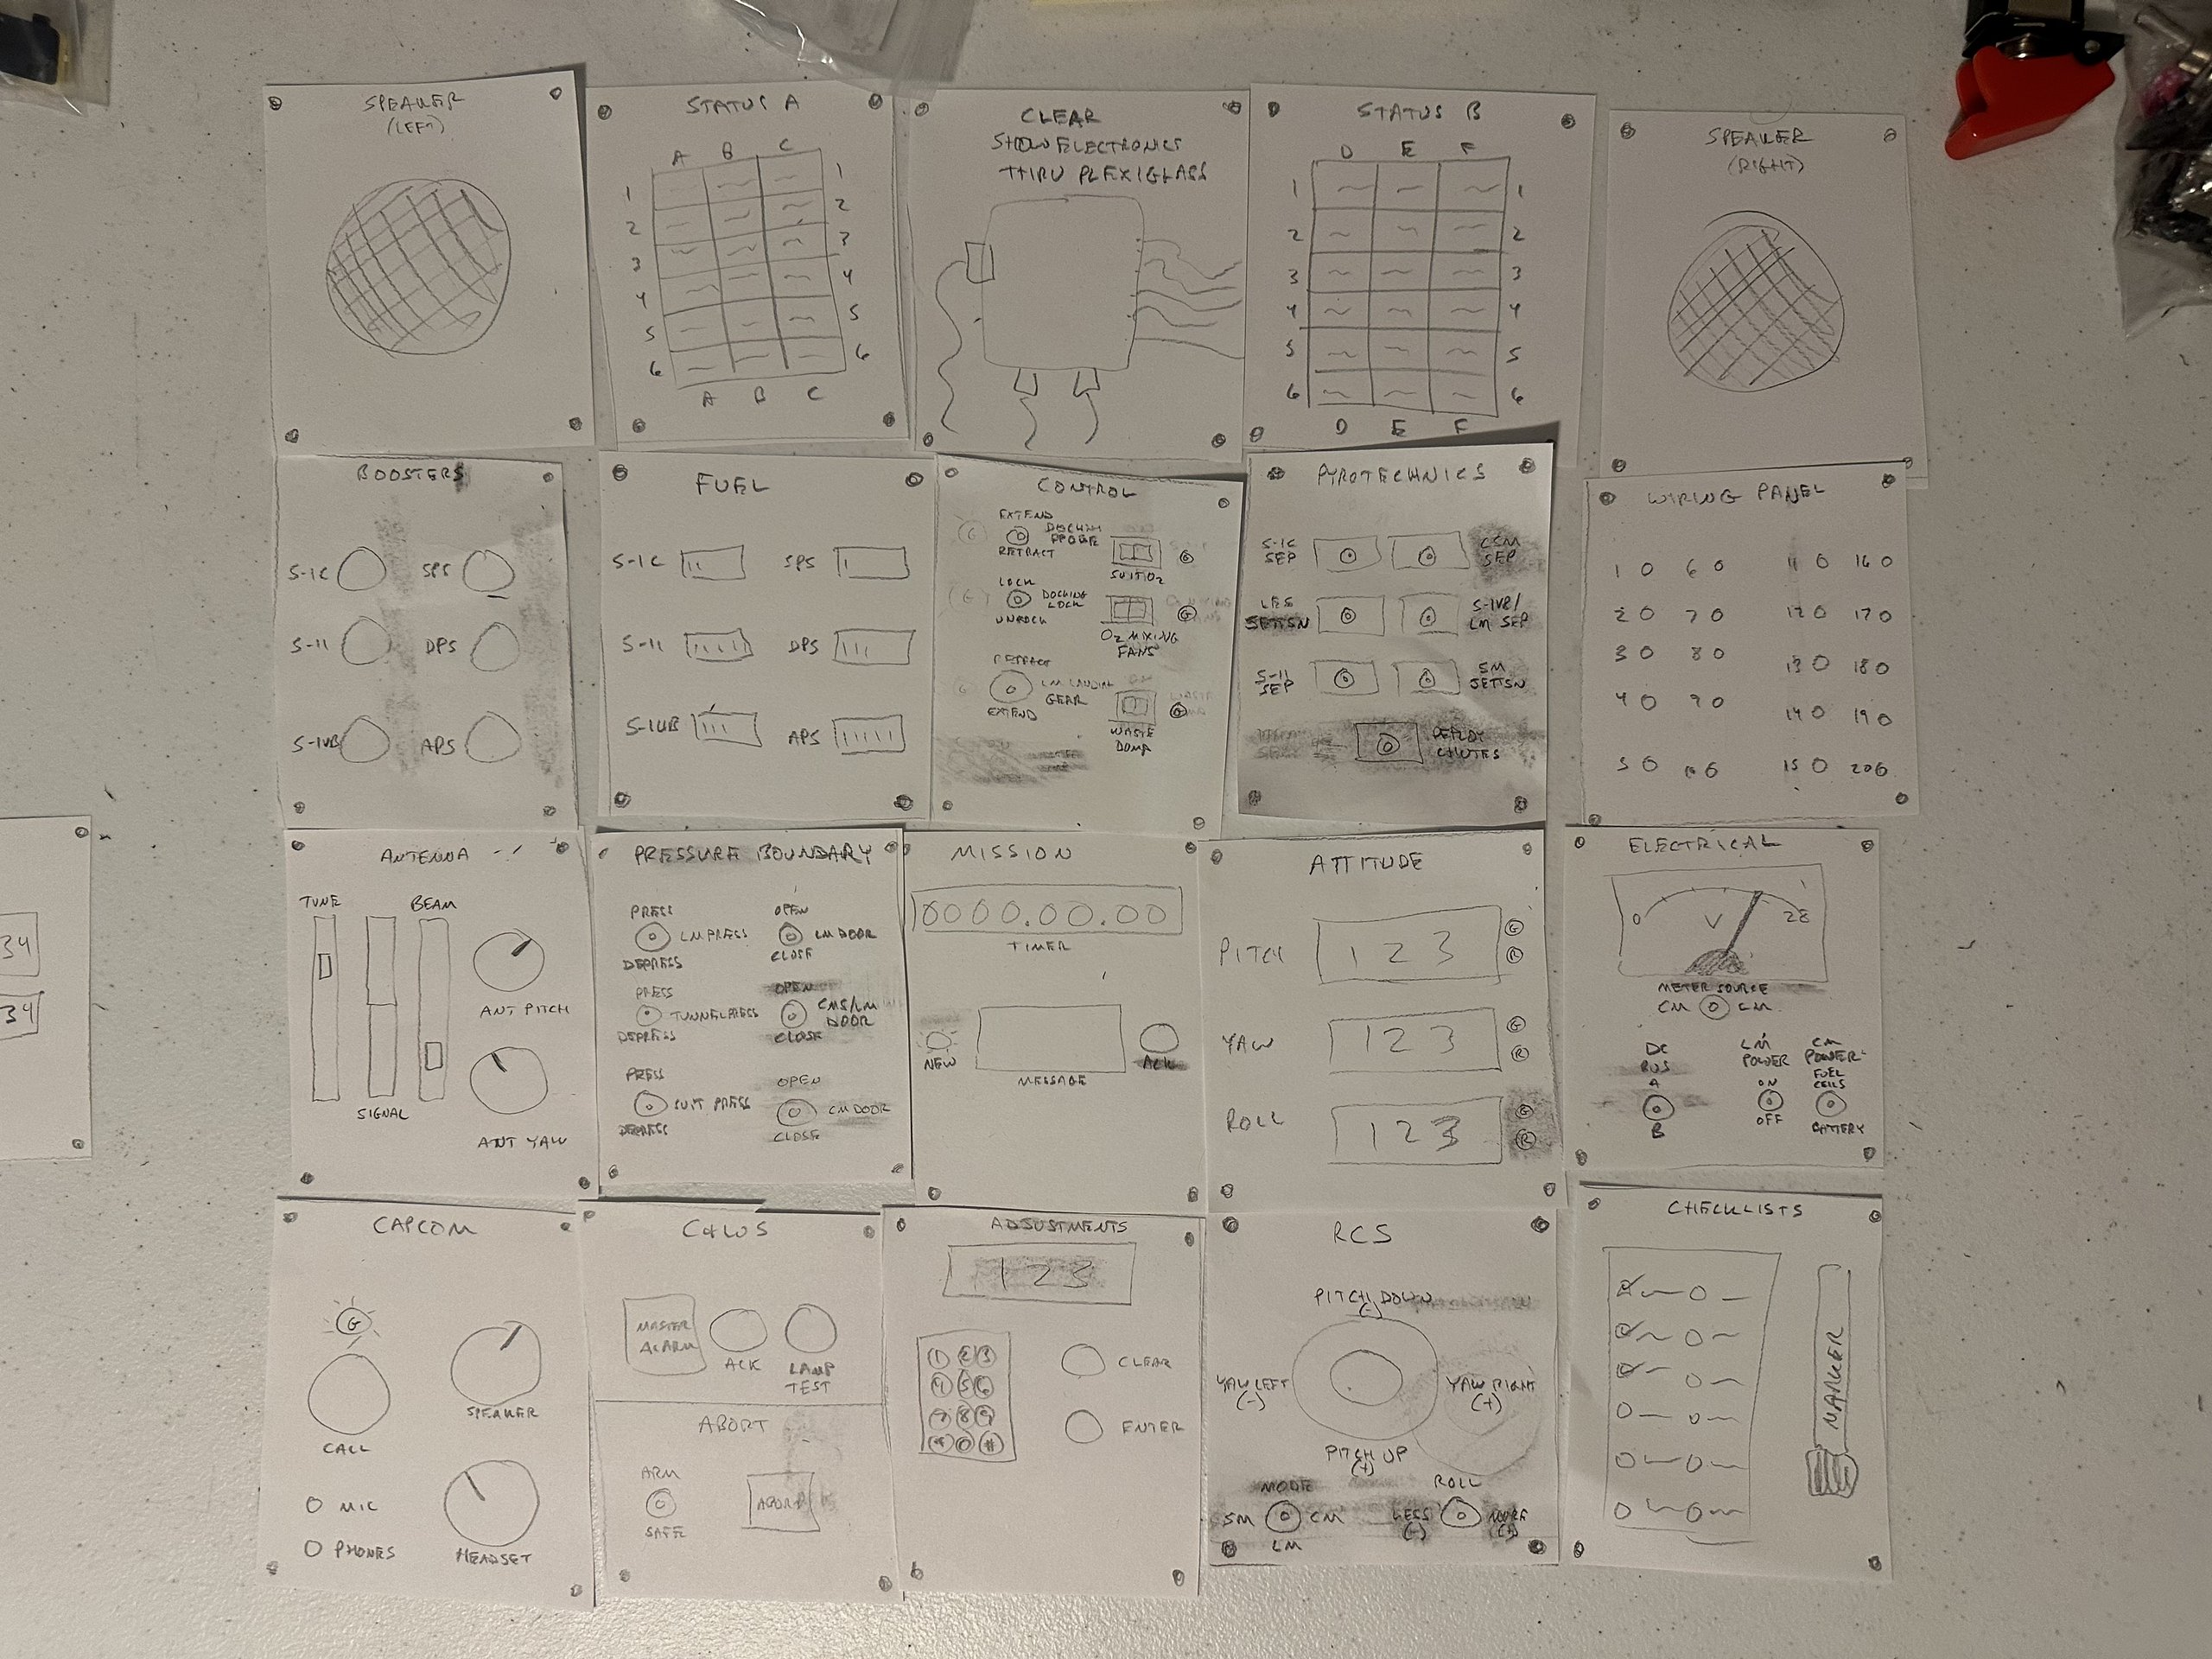
Paper is great for ideas, but it’s terrible for figuring out what actually fits. So I moved the design into Inkscape, which I used previously on the LED Bar panel layout. The key was modeling every component at its exact real-world size, including details like the mounting screws. Once everything was drawn to scale, it was obvious which panels were crowded and which had room to spare.
That let me settle on one uniform panel size that works for everything: 15 cm × 15 cm. Using the same size for every panel keeps the design consistent, makes the panels interchangeable, and simplifies the frame that holds them. Laid out in a grid 4 panels high and 5 panels wide, the full console comes out to 60 cm tall by 75 cm wide (about 23.6″ × 29.5″). The desk wouldn’t be too big (it will fit through a doorway) and I purposefully made the top row display-only so the kids didn’t have to reach that far.
Sticking to a fixed size meant some ideas didn’t survive, and a few things moved around:
- The analog voltmeter on the Electrical panel became LED bar graphs for power levels and the DC bus.
- The Wiring panel went from 20 banana jacks down to 10.
- The separate mic and phones jacks on the Capcom panel were combined into a single headset jack.
- The LCD message display moved from the Mission panel to the C&WS panel, swapping places with the abort controls.
- The Booster and Fuel panels flipped from vertical columns to horizontal rows.
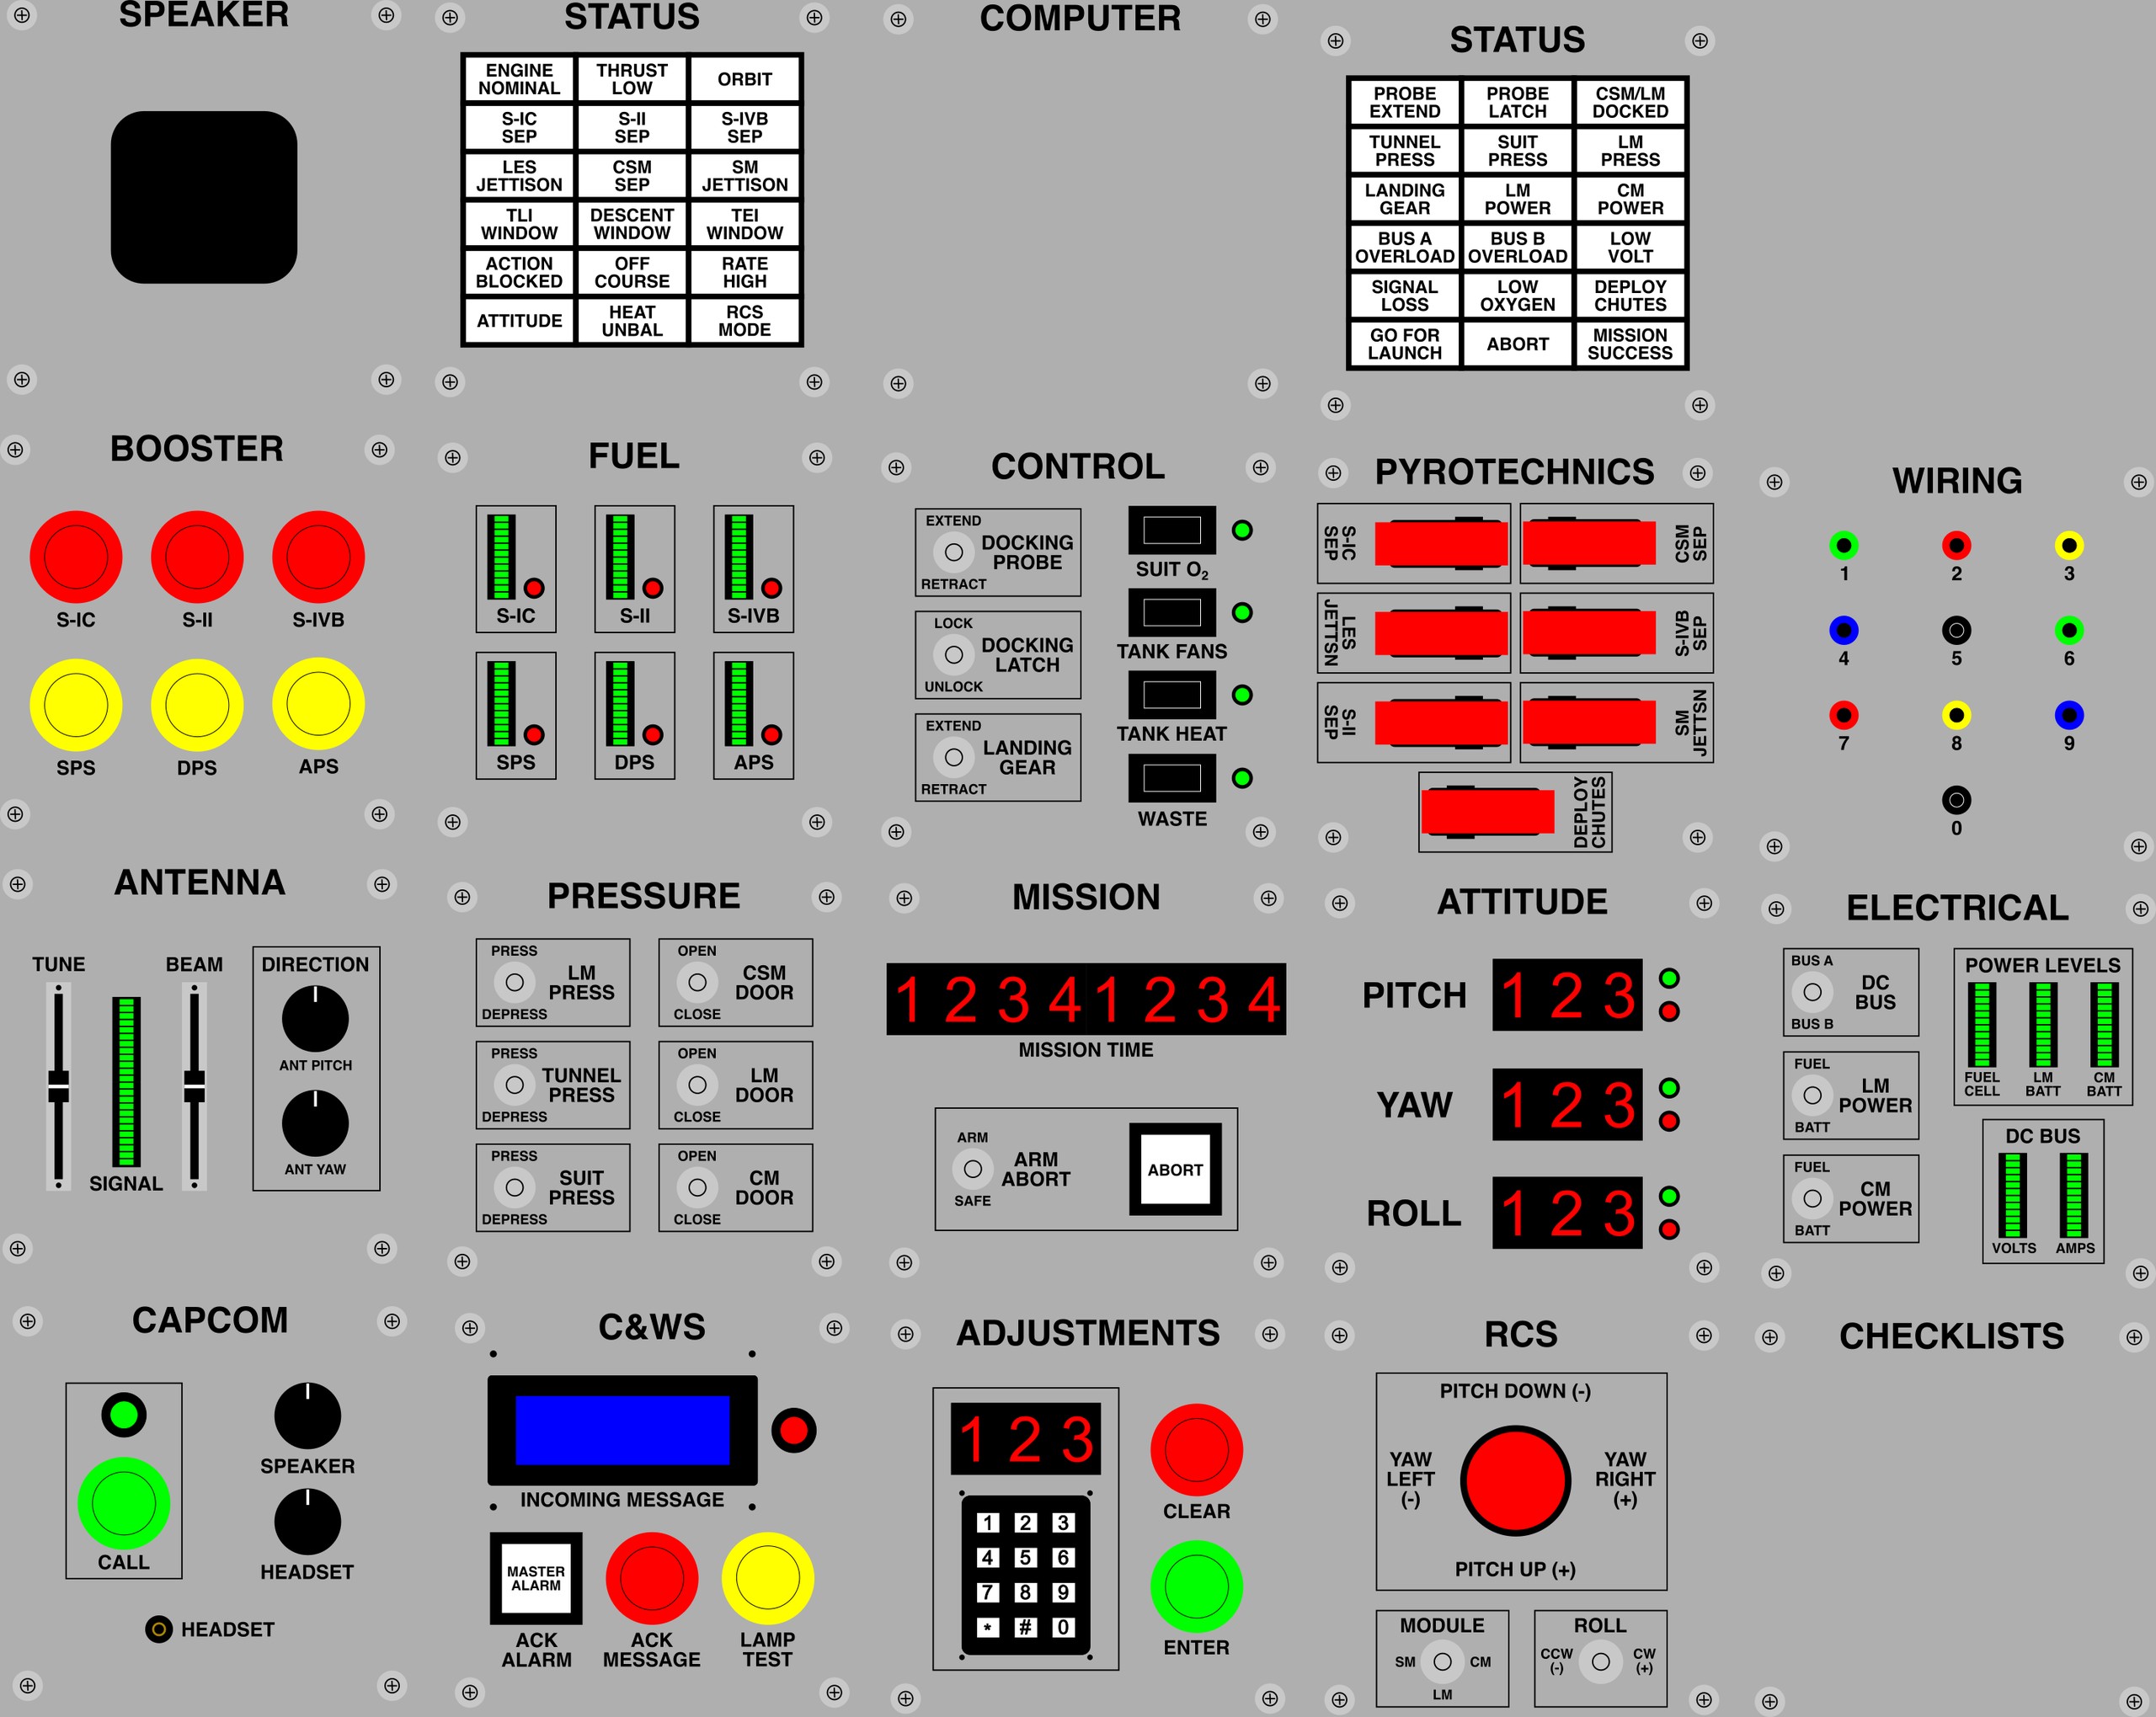
Drawing everything to scale paid off again when it came time to build. Since the Inkscape drawings are exact, I can export each panel directly to CAD software to create the 3D version for my 3D printer.
Next up is printing all 20 panels and planning out the wiring.


Leave a Reply